Edit, Save & More
How do I edit a title, its video/audio/subtitles/chapters, the thumbnail, or save my project?
01 Open the Edit Title window
Every title in the list has an Edit button (pencil icon). See the title list →
- On the Add title screen, click the Edit button on a title card.
- The Edit Title window opens with a sidebar on the left: General, Chapters, Audio Tracks, Subtitles and Video.
- Each tab is described below. Confirm your changes and the title card updates.
02 General tab - name, aspect ratio and thumbnail
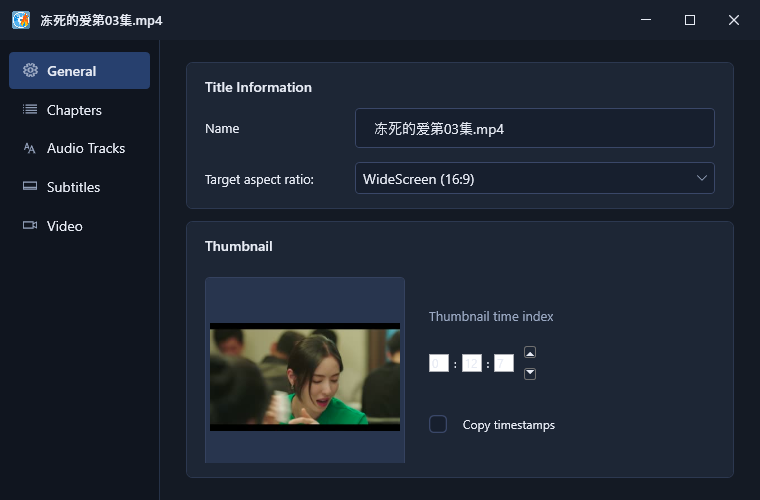
- Name
- The display name of the title (defaults to the file name).
- Target aspect ratio
- How the video is shown - for example WideScreen (16:9) or Normal (4:3).
- Thumbnail
- A live preview of the frame used as the title's thumbnail.
- Thumbnail time index
- Set the exact moment of the video used for the thumbnail - use the hour:minute:second spin boxes (HH:MM:SS).
- Copy timestamps
- Keeps the original chapter timestamps when checked.
How do I change a title's thumbnail?
- Open the title's Edit window (General tab).
- Change the Thumbnail time index to the frame you want.
- Confirm - the preview and the title card thumbnail update immediately.
03 Video tab - video sources
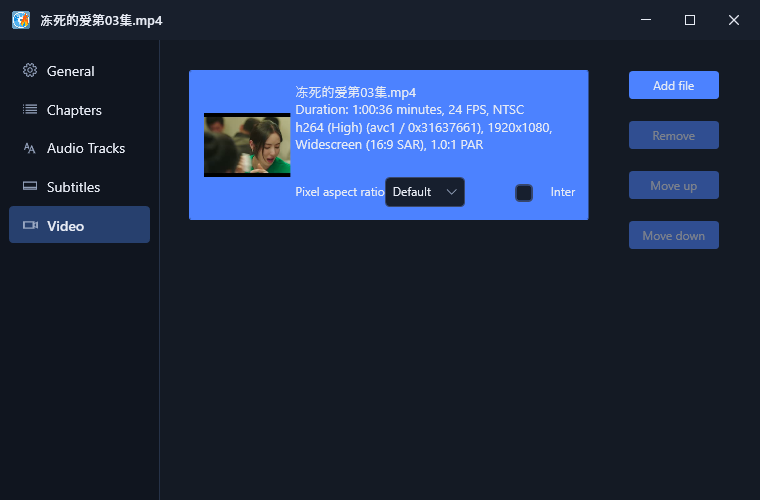
The Video tab lists the video sources of the title. Each source shows its thumbnail, file name, duration, frame rate and format - for example:
Duration: 1:00:36 minutes, 24 FPS, NTSC - h264 (High), 1920x1080, Widescreen (16:9 SAR), 1.0:1 PAR
- Pixel aspect ratio
- Override the pixel aspect ratio of the source (defaults to Default).
- Interlaced
- Marks the source as interlaced when needed.
- Add file / Remove / Move up / Move down
- Add more video files to the title, remove one, or change their order. Move buttons are disabled when there is only one source.
04 Audio Tracks tab
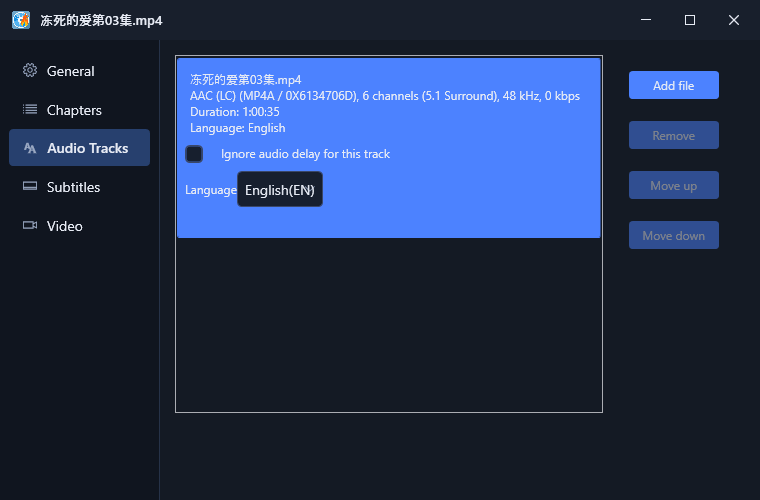
Each audio track shows its source file, format, channels, sample rate and duration - for example AAC (LC), 6 channels (5.1 Surround), 48 kHz.
- Language
- Sets the language of the track, for example English (EN).
- Ignore audio delay for this track
- When checked, the track's built-in delay is ignored.
- Add file
- Add an external audio track (for example a better-quality soundtrack) to the title.
05 Subtitles tab
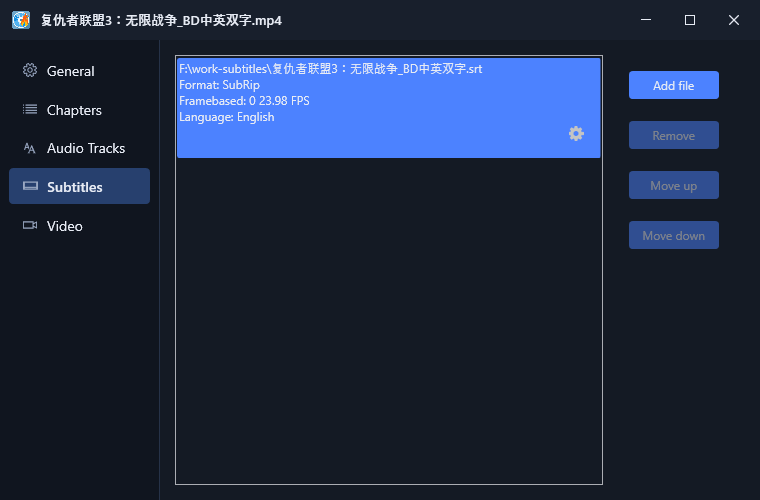
Subtitle tracks are listed with their file, format and frame rate - for example SubRip, 23.98 FPS. Use Add file to attach a subtitle file (.srt, .ssa and others).
Click the gear icon on a track to open its settings, where you can change the font, size, colors, position, alignment and the subtitle frame rate.
06 Chapters tab - automatic chapters
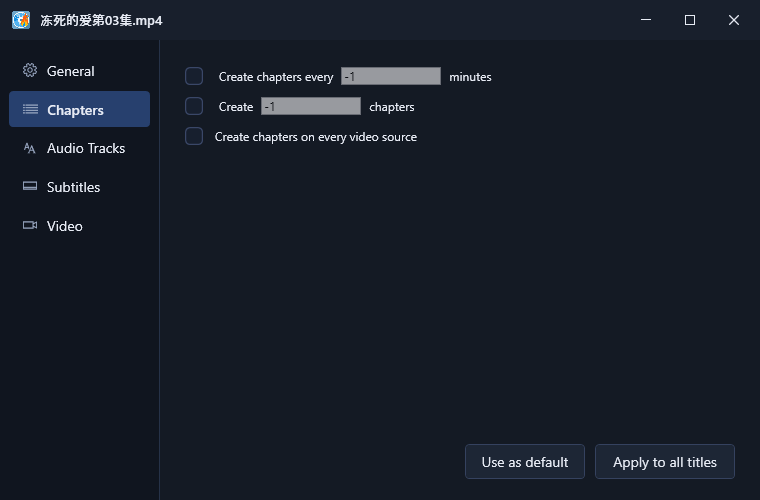
- Create chapters every ... minutes
- Adds a chapter at a fixed interval - for example every 5 minutes.
- Create ... chapters
- Splits the title into a fixed number of equally-sized chapters.
- Create chapters on every video source
- Adds a chapter at the start of each video source in the title.
- Use as default / Apply to all titles
- Save these chapter settings as the default for new titles, or apply them to every title in the project.
07 Save your project
Your project is saved to the Project Profile Path you set in the first step of the wizard. Saving keeps all your titles, settings and menu choices, so you can come back and continue later - or start the burn at another time.
08 Open a recent project
- On the Home screen, click Recent Projects.
- Select the project from the list to continue exactly where you left off.
09 Change the language or appearance
- On the Home screen, click Settings.
- Under Appearance, switch between light and dark themes.
- Under Language, choose the interface language - the app updates right away.