Bree Photo Quick Start
Note: Screenshots in this tutorial may show GIMP branding, but all menus, tool names, and keyboard shortcuts are identical in Bree Photo and the steps can be followed directly.
Bree Photo is a powerful image-editing program. Even if you don’t have much image-editing experience, you can use it to quickly make common adjustments. This tutorial introduces four basic operations:
- Changing image size (scaling)
- Changing JPEG file size
- Cropping an image
- Rotating or flipping an image
Changing Image Size (Scaling)
When you need to reduce an oversized image for the web, email, or social media, use Image → Scale Image.
After opening an image, the title bar shows the current pixel dimensions. For example:
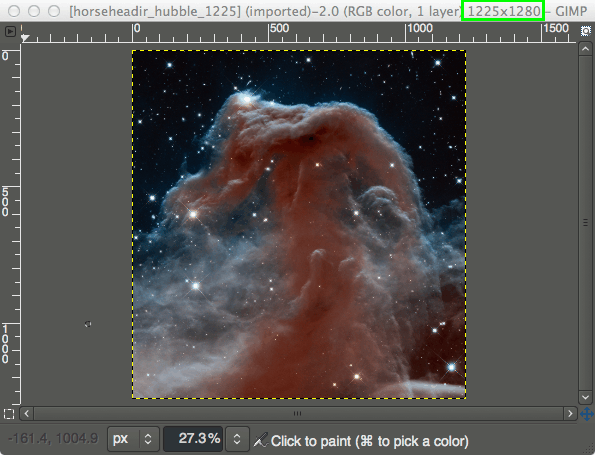
Choose Image → Scale Image to open the Scale Image dialog:
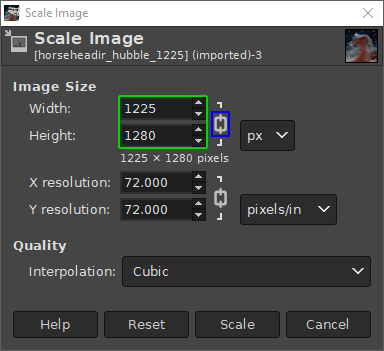
Enter the new dimensions in Width and Height. The small chain icon between the two fields means the aspect ratio is locked; changing one will automatically adjust the other proportionally.
For example, if you change the width to 600px, the height will automatically become 627px:
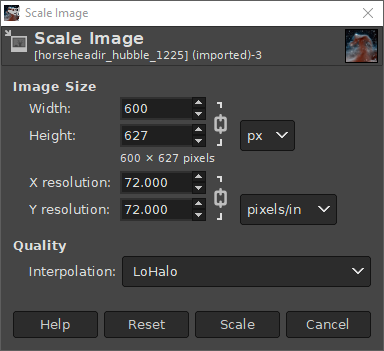
Under Quality → Interpolation, it is recommended to change the default Cubic to LoHalo for better scaling quality.
Click the px drop-down to enter dimensions in other units such as percent. For example, choosing percent and entering 50 will shrink the image to half its original size.
When finished, export using either:
File → Export As…— export as a new fileFile → Overwrite— overwrite the original file (use with caution)
Changing JPEG File Size
JPEG is a lossy compression format; you can reduce file size by lowering quality during export.
The image below shows the same image at different JPEG quality settings:
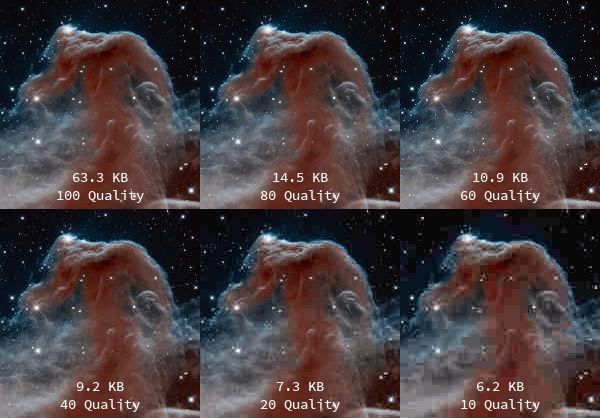
Even at quality 80, the file size drops dramatically (about 77% in the example above) while the image remains acceptable.
When exporting, choose File → Export As… and enter a filename with a .jpg extension. Bree Photo will automatically export as JPEG:
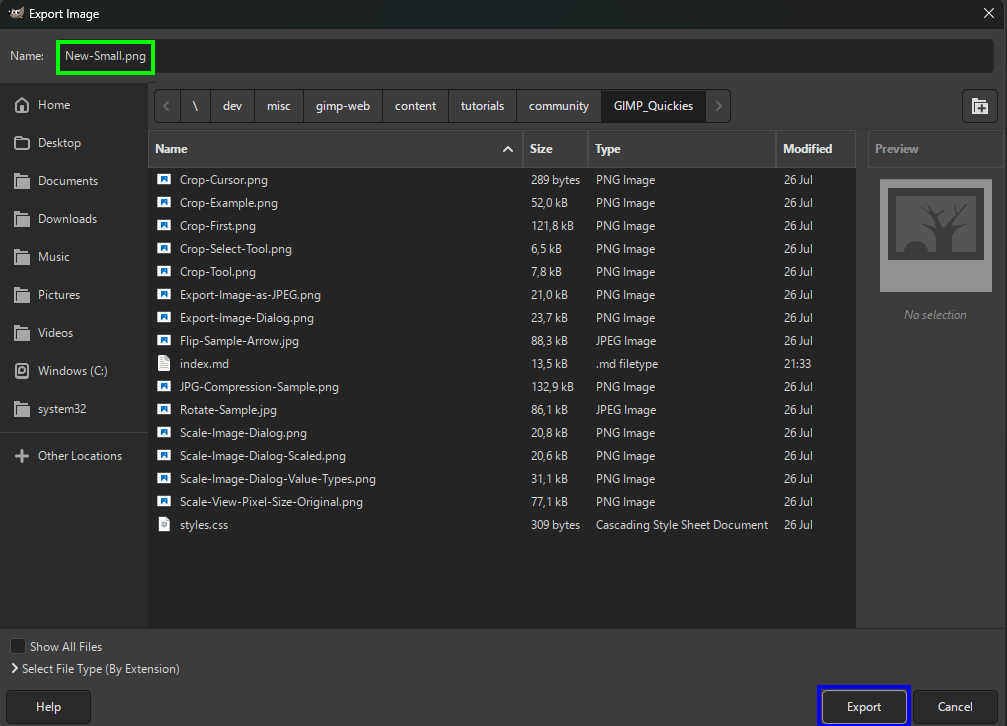
After clicking Export, the Export Image as JPEG dialog appears, where you can adjust the Quality slider:
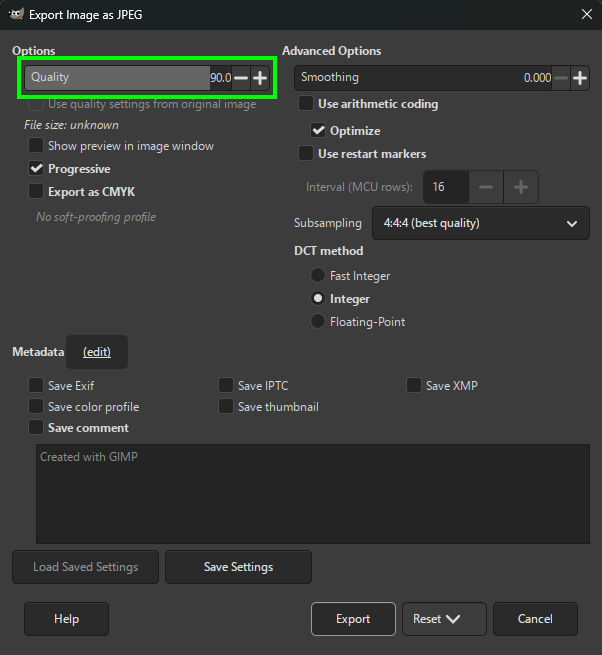
If you check Show preview in image window, the canvas will reflect the current quality setting in real time and show the estimated file size.
Cropping an Image
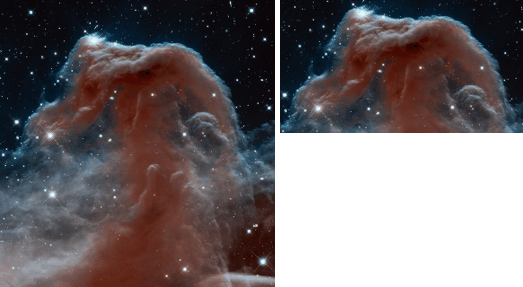
Cropping removes unwanted edges or focuses attention on a detail.
Activate the Crop Tool:
- Click the Crop Tool icon in the toolbox:
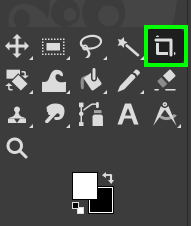
- Or use the menu:
Tools → Transform Tools → Crop
Click and drag on the canvas to draw an initial crop area:
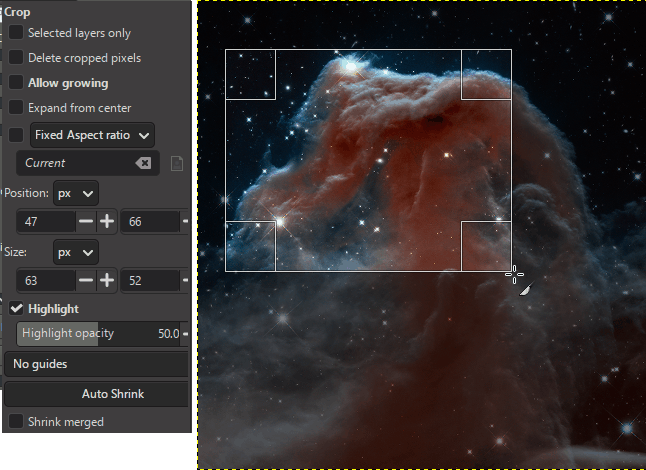
You can then move the cursor to the edges or corners and drag to fine-tune the area. Press Enter to apply the crop, or Esc to cancel.
Alternative Method: Crop from a Selection
You can also use the Rectangle Select Tool to create a rectangular selection:
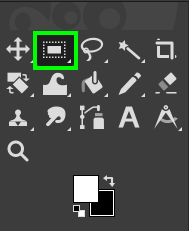
Once the selection is set, choose Image → Crop to Selection to crop to the selection.
Rotating or Flipping an Image
Flipping
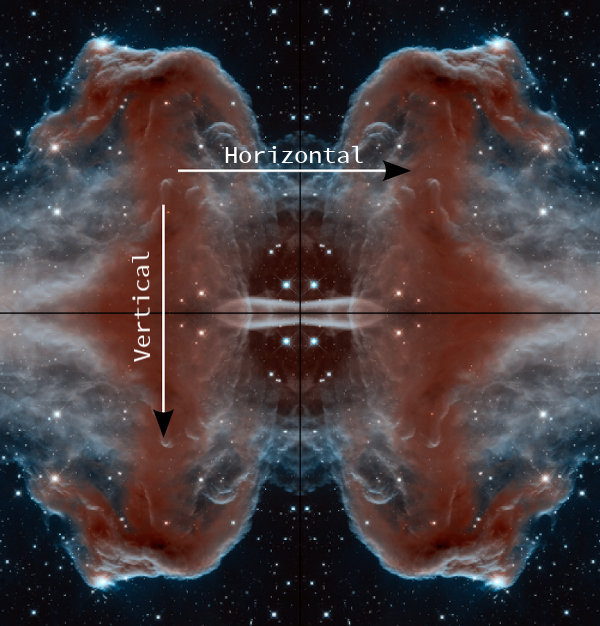
Choose Image → Transform → Flip Horizontally or Flip Vertically to mirror the image horizontally or vertically:
Rotating
Under Image → Transform, you’ll find Rotate 90° clockwise, Rotate 90° counter-clockwise, and Rotate 180° for rotating the entire image.
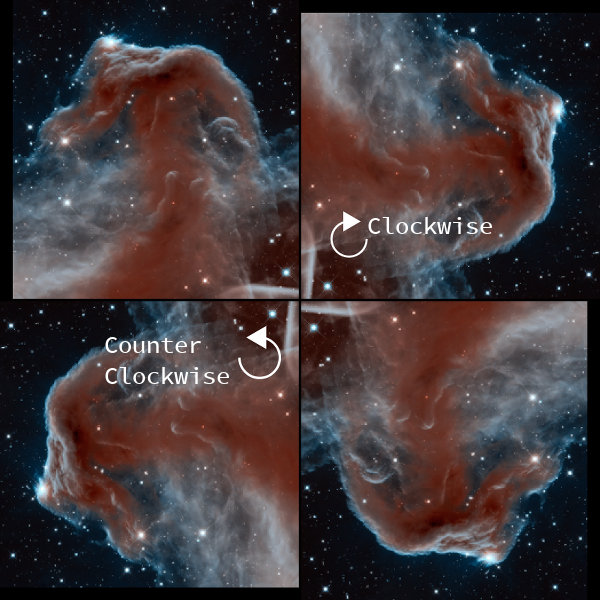
For arbitrary-angle rotation, use the layer-level Tools → Transform Tools → Rotate.
Conclusion
These operations are only the tip of Bree Photo’s capabilities. Once you’ve mastered these basics, you can explore more advanced image-editing techniques.
Source & License
This tutorial is adapted from Pat David’s GIMP Quickies, licensed under the Creative Commons Attribution-ShareAlike 3.0 Unported License.