Defining Index or Table of Contents Entries
To Define Index Entries
-
Click in a word, or select the words in your document that you want to use as an index entry.
-
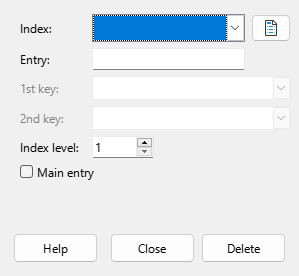
Choose , and do one of the following:
-
To change the text that appears in the index, type the text that you want in the Entry box. The text that you type here does not replace the selected text in the document.
-
To add index entries for all other occurrences of the selected entry text in your document, select .
-
To add the entries to a custom index, click the New User-defined Index icon, enter the name of the index, and then click OK.
To Define Table of Contents Entries
The best way to generate a table of contents is to apply the predefined “Heading N” paragraph styles, such as “Heading 1”, to the paragraphs that you want to include in your table of contents.
To Use a Custom Paragraph Style as a Table of Contents Entry
-
Choose and click the Numbering tab.
-
Select the paragraph style that you want to include in your table of contents in the Paragraph Style box.
-
In the Level list, click the level for the paragraph style.
-
Click OK. You can now apply the style to headings in your document and include them in your table of contents.

MC Office Suite creates the table of contents entries based on the outline level of the paragraph style and the paragraph contents. If the paragraph is empty, it will not be included in the table of contents. To force the empty paragraph to be listed in the table of contents, manually add a space or a non breaking space to the paragraph. Spaces added in the After text box of the Numbering tab in the Heading Numbering dialog will not work for this purpose, since they are part of the paragraph numbering, not the paragraph contents.