02
Set Up Your Project
How do I set the project name, disc size and encoding?
01 Project Profile Setting
After choosing DVD Disc on the Home screen, the first step is the project profile.
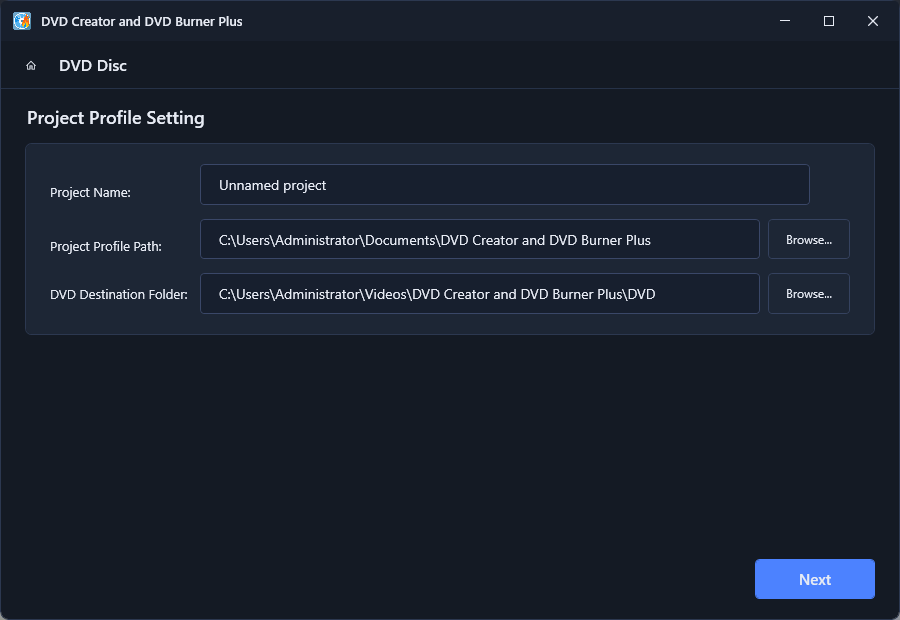
- Project Name - type a name for your DVD project (for example Family Vacation).
- Project Profile Path - where the project file is saved. Click Browse... to pick another folder.
- DVD Destination Folder - where the finished DVD output is written. Click Browse... to change it.
- Click the blue Next button to continue.
The default folders are created for you: projects go to Documents\DVD Creator and DVD Burner Plus and output goes to Videos\DVD Creator and DVD Burner Plus\DVD.
02 General settings (the "General" tab)
The Project Settings page has five tabs: General, Video, Audio, Playback and Burning. Start with General.
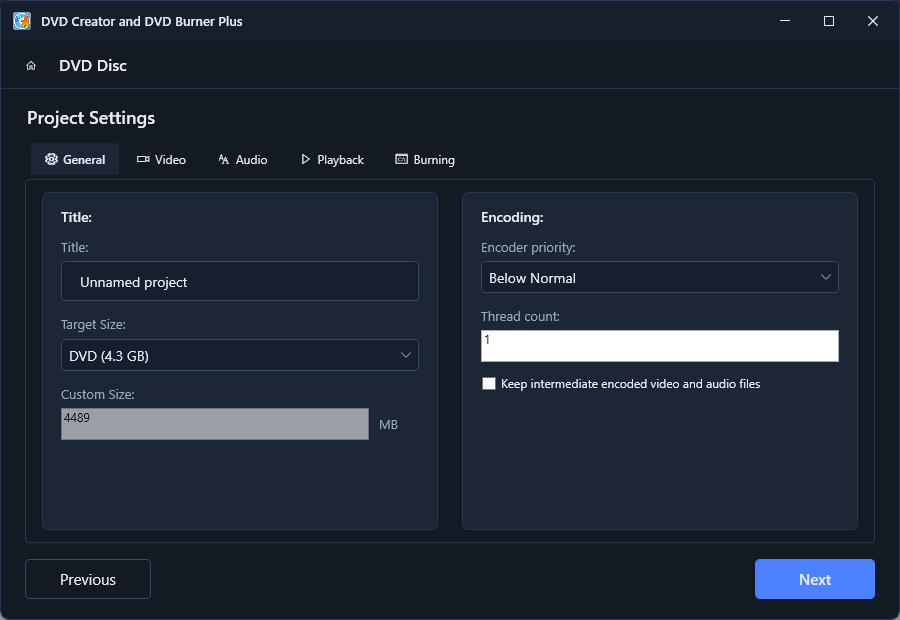
- Title
- The DVD title shown on the disc. It starts as "Unnamed project" - give it a real name.
- Target Size
- Choose the disc size. The default is DVD (4.3 GB). Select Custom Size if you want a different capacity (for example to fit a smaller project or a dual-layer target).
- Custom Size (MB)
- Only active when Custom Size is selected. Type the capacity in megabytes - 4489 MB is a standard single-layer DVD.
- Encoder priority
- How much CPU time the video encoding takes. Lower priority keeps the PC more responsive while working; higher priority encodes faster but may slow other programs.
- Thread count
- How many encoding threads are used. 1 works everywhere; increase it on multi-core machines to speed up encoding.
- Keep intermediate encoded video and audio files
- If checked, the temporary encoded files are kept after burning. Useful for debugging or re-burning without re-encoding, but it uses extra disk space.
The disc capacity shown later on the "Add title" page is based on the Target Size you pick here - choose the right size before adding your videos.