04
Burn Options
How do I set burning properties - output, drive, speed, erase, verify and auto-eject?
01 Choose the output
The Burning tab of Project Settings decides what happens when you click Start Burning.
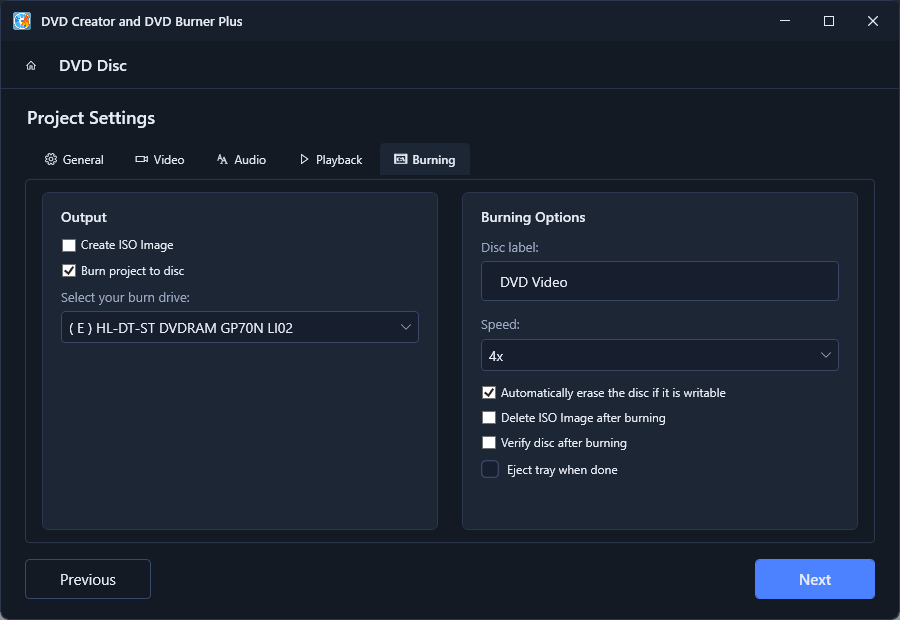
- Create ISO Image - produces an ISO file of the DVD (great for backups and for burning later on any computer).
- Burn project to disc - writes the DVD directly to a disc in your burner.
- Select your burn drive - pick the writer from the dropdown. It shows the drive letter and model, for example ( E ) HL-DT-ST DVDRAM GP70N.
You can check both Create ISO Image and Burn project to disc at the same time - the app will create the ISO first, then burn it to disc.
02 Burning options
- Disc label
- The volume label written to the disc - for example "DVD Video".
- Speed
- Write speed of the burner, for example 4x. Lower speeds are usually more reliable with cheap discs.
- Automatically erase the disc if it is writable
- Erases a rewritable disc (DVD-RW / DVD+RW) before burning, so you don't have to clear it manually.
- Delete ISO Image after burning
- Removes the ISO file once it has been successfully written to disc - handy when you only want the disc.
- Verify disc after burning
- Reads the disc back and compares it with the source. Recommended for important discs.
- Eject tray when done
- Opens the disc tray automatically when the burn finishes.
How do I make the disc tray open automatically after burning?
- Open the Burning tab in Project Settings.
- In Burning Options, tick Eject tray when done.
- Click Next and finish your project - the tray will open on its own when burning completes.
How do I burn a rewritable disc without clearing it first?
Tick Automatically erase the disc if it is writable. The app clears the rewritable disc right before burning, so you can re-use the same disc over and over.
If burning fails on cheap media, lower the Speed (for example from 8x to 4x) and enable Verify disc after burning.