Tone Mapping and Shadow Recovery in Bree Photo
Note: Screenshots in this tutorial may show GIMP branding, but all menus, tool names, and keyboard shortcuts are identical in Bree Photo and the steps can be followed directly.
This tutorial explains how to use 32-bit floating-point Colors → Exposure together with a layer mask to brighten shadows and midtones while protecting highlight detail. This method is often called “shadow recovery” or “tone mapping.”
Preparation
Download the sample image tree.png (16-bit sRGB).
- Open
tree.pngin Bree Photo and assign the built-in sRGB profile. - Convert to 32-bit floating-point linear precision:
Image → Precision → 32-bit floating point, and choose Linear light in the Dither dialog that appears.
Step 1: Add Positive Exposure Compensation
- Duplicate the
tree.pnglayer and name it+1 stop exposure comp. - Choose
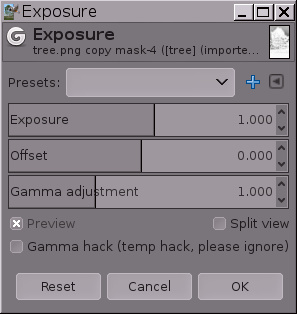
Colors → Exposureand increase Exposure by 1 stop:
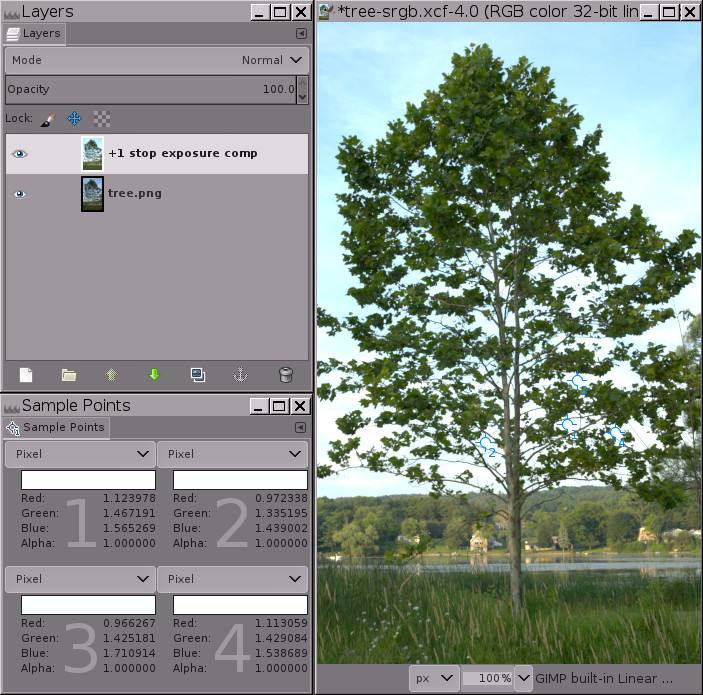
- At this point the image highlights may look “overexposed,” but in floating-point precision
Colors/Exposureis unbounded; the overly bright regions are preserved as floating-point values greater than1.0, so detail is not lost:
Step 2: Add an Inverse Grayscale Mask
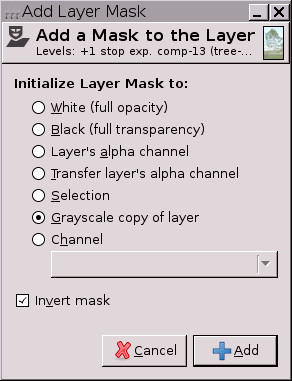
- Right-click the
+1 stoplayer and chooseLayer → Mask → Add Layer Mask…. - Set initialization to Grayscale copy of layer and check Invert mask:
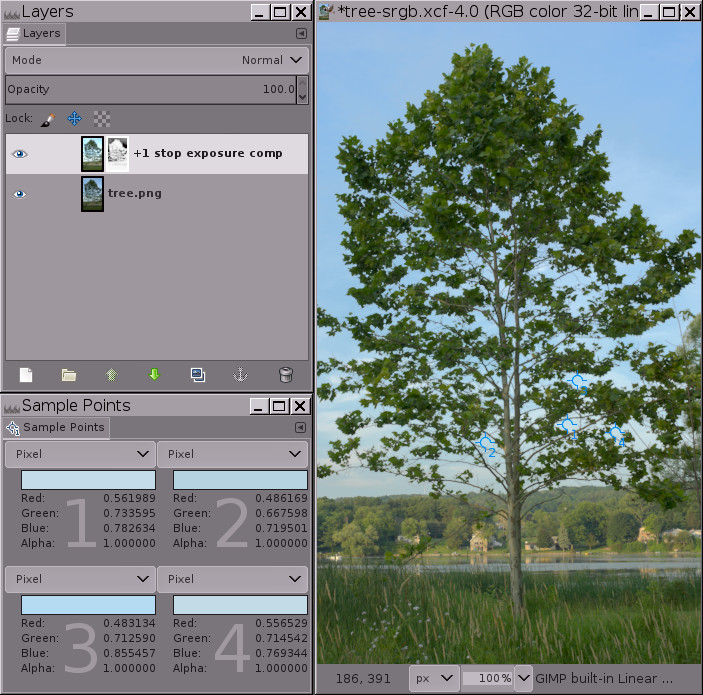
- The highlights are now pushed back into the display range (
0.0 - 1.0), although the image may temporarily look flat and gray:
Step 3: Stretch Mask Contrast
- Click to select the layer mask.
- Choose
Colors → Auto → Stretch Contrast:
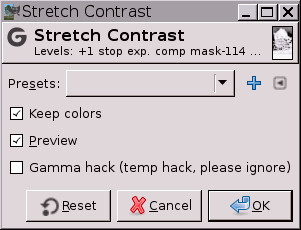
- This pulls any grayscale values in the mask that are outside the display range back into the
0 - 1range, so the mask protects highlights while brightening shadows:
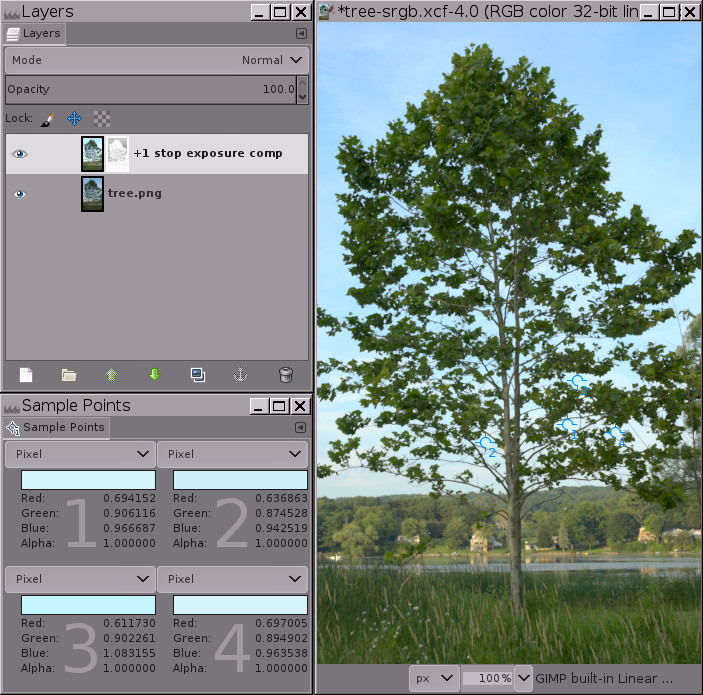
If a few channel values still extend slightly outside the range, apply Colors → Exposure to the mask with Gamma around 0.45; or create a New from Visible layer and apply Auto → Stretch Contrast again.
Advanced: Multiple Stops of Exposure Compensation
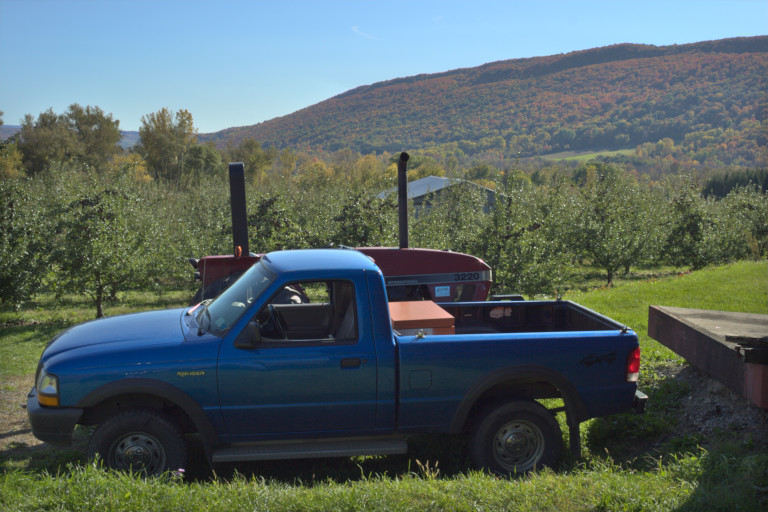
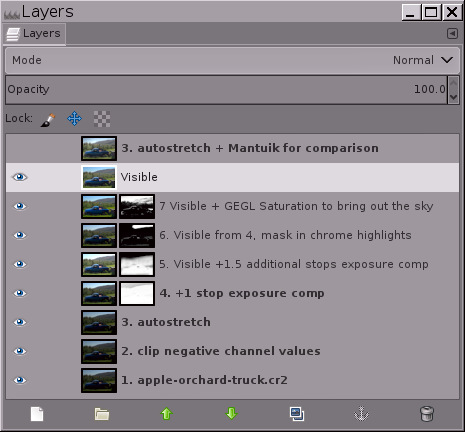
For images that need more brightening, you can stack several exposure-compensation layers. Each layer has its own mask and needs individual fine-tuning. The image below shows a 2.5-stop brightening of an orchard-truck photo using two exposure-compensation layers:
The corresponding layer stack:
Restoring Local Contrast
Inverse grayscale masks can slightly flatten local contrast. To restore it, apply an edge-preserving blur to the mask, such as G’MIC’s bilateral smooth. Note: G’MIC cannot act directly on a layer mask, so convert the mask to a selection, save it as a channel, and process it in the layer stack.
Conclusion
Colors → Exposure is unbounded in 32-bit floating-point precision. Combined with an inverse grayscale mask, it is an effective way to handle high-dynamic-range photos and recover shadow detail.
Source & License
This tutorial is adapted from Elle Stone’s Tone Mapping and Shadow Recovery Using GIMP’s ‘Colors/Exposure’, licensed under the Creative Commons Attribution-ShareAlike 3.0 Unported License.